
Solution Colors Gallery feed (extension)

Allows you to associate a color with a solution and display it in various locations within Visual Studio. Inspired by the Peacock extension for VS Code.
▼ Download- Author
- Mads Kristensen
- Version
- 1.1.102
- Updated
- 14 hours ago
- Tags
- colors, solution, peacock
- Supports
- VS 2022 VS 2026 VS 2022 (ARM64) VS 2026 (ARM64)
Solution Colors for Visual Studio
Allows you to associate a color with a solution or folder and display it in various locations within Visual Studio. Inspired by the Peacock extension for VS Code and this Visual Studio feature request.



Download this extension from the Visual Studio Marketplace or get the CI build.
When you have multiple instances of Visual Studio open at the same time, it can be tricky to tell them apart. Especially if you’re working on different branches of the same solution, which makes them look almost identical. This extension solves this issue by colorizing each instance to make it easy to tell them apart.
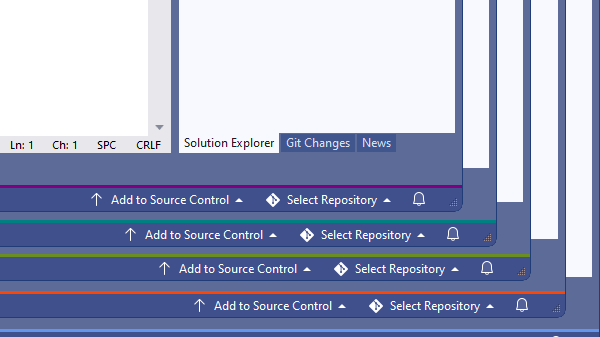
The result is a subtle, yet very visible colorization that doesn’t feel noisy or distracting. It puts you in control with an array of customization options.
Getting Started
To enable colorization, open a solution or folder in Visual Studio.
In the Solution Explorer window > Right click the top level solution > Set Solution Color > (Select Color)
From here you can choose between a list of predefined colors matching the color palette used for colorizing document tabs.
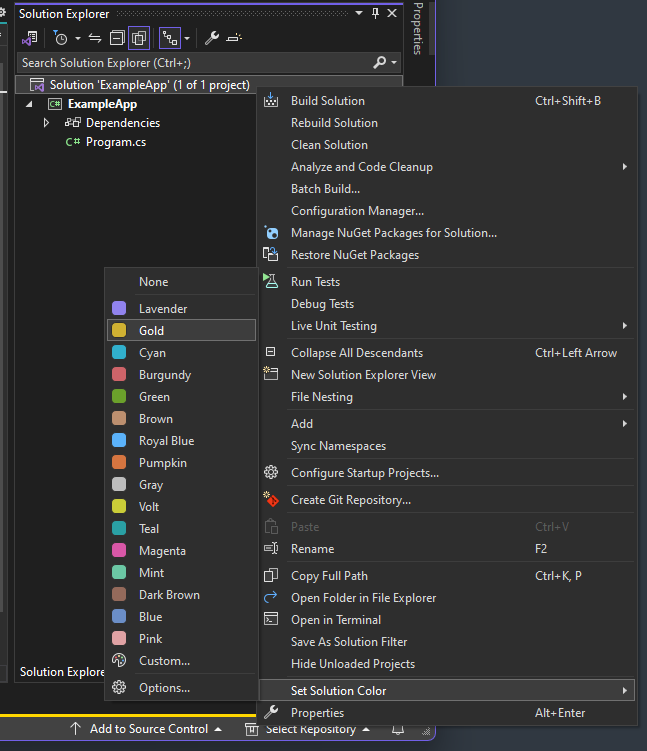
You are not limited to only choosing between the predefined colors. By selecting Custom... you can choose any custom color from the color dialog.
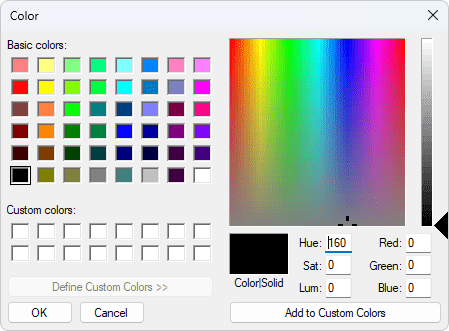
By default, the extension stores the color and custom icon in the solution's .vs folder. You can instead store them in the solution root or configure a custom directory.
Settings file storage
The Tools -> Options page provides the following storage options:
- Save settings file in root folder stores
color.txtandicon.imgin the solution or workspace root instead of the .vs folder. - Include solution name in settings filenames prefixes both filenames with the full solution filename. For example,
Product.slnusesProduct.sln.color.txtandProduct.sln.icon.img. This allows multiple solutions in the same directory to keep separate settings. - Custom settings directory overrides the default .vs or root location. Absolute paths and paths relative to the solution directory are supported, along with environment variables and the
$(SolutionDir)and$(SolutionName)tokens.
For example, $(SolutionDir)\..\Settings\$(SolutionName) stores each solution's settings in its own directory under a shared Settings folder.
After selecting a color manually, the Automatic button changes to None. That allows you to remove the color if you no longer want it.
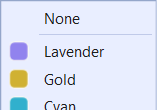
Automatic
Instead of manually assigning a color to every solution, Visual Studio can do it automatically. With this option enabled, all solutions will be assigned a color when opened. The color is calculated using a stable, case-insensitive hash of the full solution path, so each solution receives a deterministic color across Visual Studio sessions.
When Automatic colorization is enabled, the button in the submenu shows a checkmark.
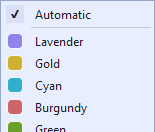
When automatic colorization is enabled, you can still choose your own custom color for your solution. A manually selected color always takes precedence over automatic.
Colorized elements
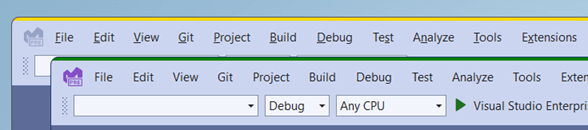
The solution name in the title bar is visible at all times and located at the top, which makes it a prime location for colorization.

In addition, the 3 top-most pixels of Visual Studio span the full width of the window. This is especially visible when Visual Studio instances are floating or if you’ve chosen not to display the solution name label.
The Windows Taskbar shows the colors in the thumbnails as well.
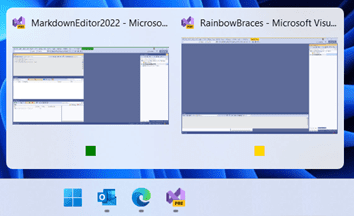
And if you don’t group the Taskbar items, each item will show the color as well.

This gives you 4 different locations to display the color and you can use all of them, or just the ones you find most helpful. You can control all that from the Tools -> Options page.
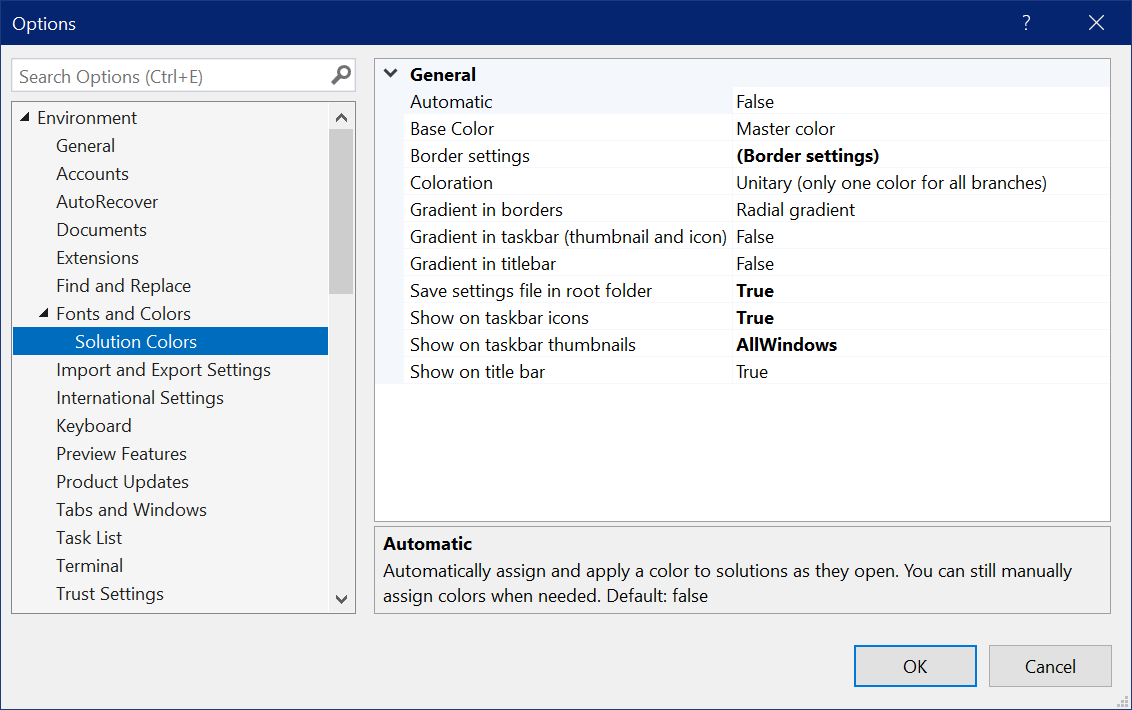
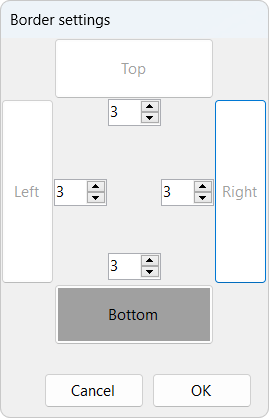
To customize the colored borders, open the Border settings dialog and chose which borders and what thickness to display.
How can I help?
If you enjoy using the extension, please give it a ★★★★★ rating on the Visual Studio Marketplace.
Should you encounter bugs or if you have feature requests, head on over to the GitHub repo to open an issue if one doesn't already exist.
Pull requests are also very welcome, since I can't always get around to fixing all bugs myself. This is a personal passion project, so my time is limited.
Another way to help out is to sponsor me on GitHub.